How I Healed My SI Joint Pain

Sacroiliac joint diagram
Pain in the SI joint can be debilitating. Courtesy Mikael Häggström

It took about six months, but I’m finally back running (shorter distances) mostly pain free. How did I do it? Well, first let me tell you what I would have done differently, and then I’ll take you through what I think helped me heal the most. As always:

Disclaimer: This is not medical advice. I am not a doctor.

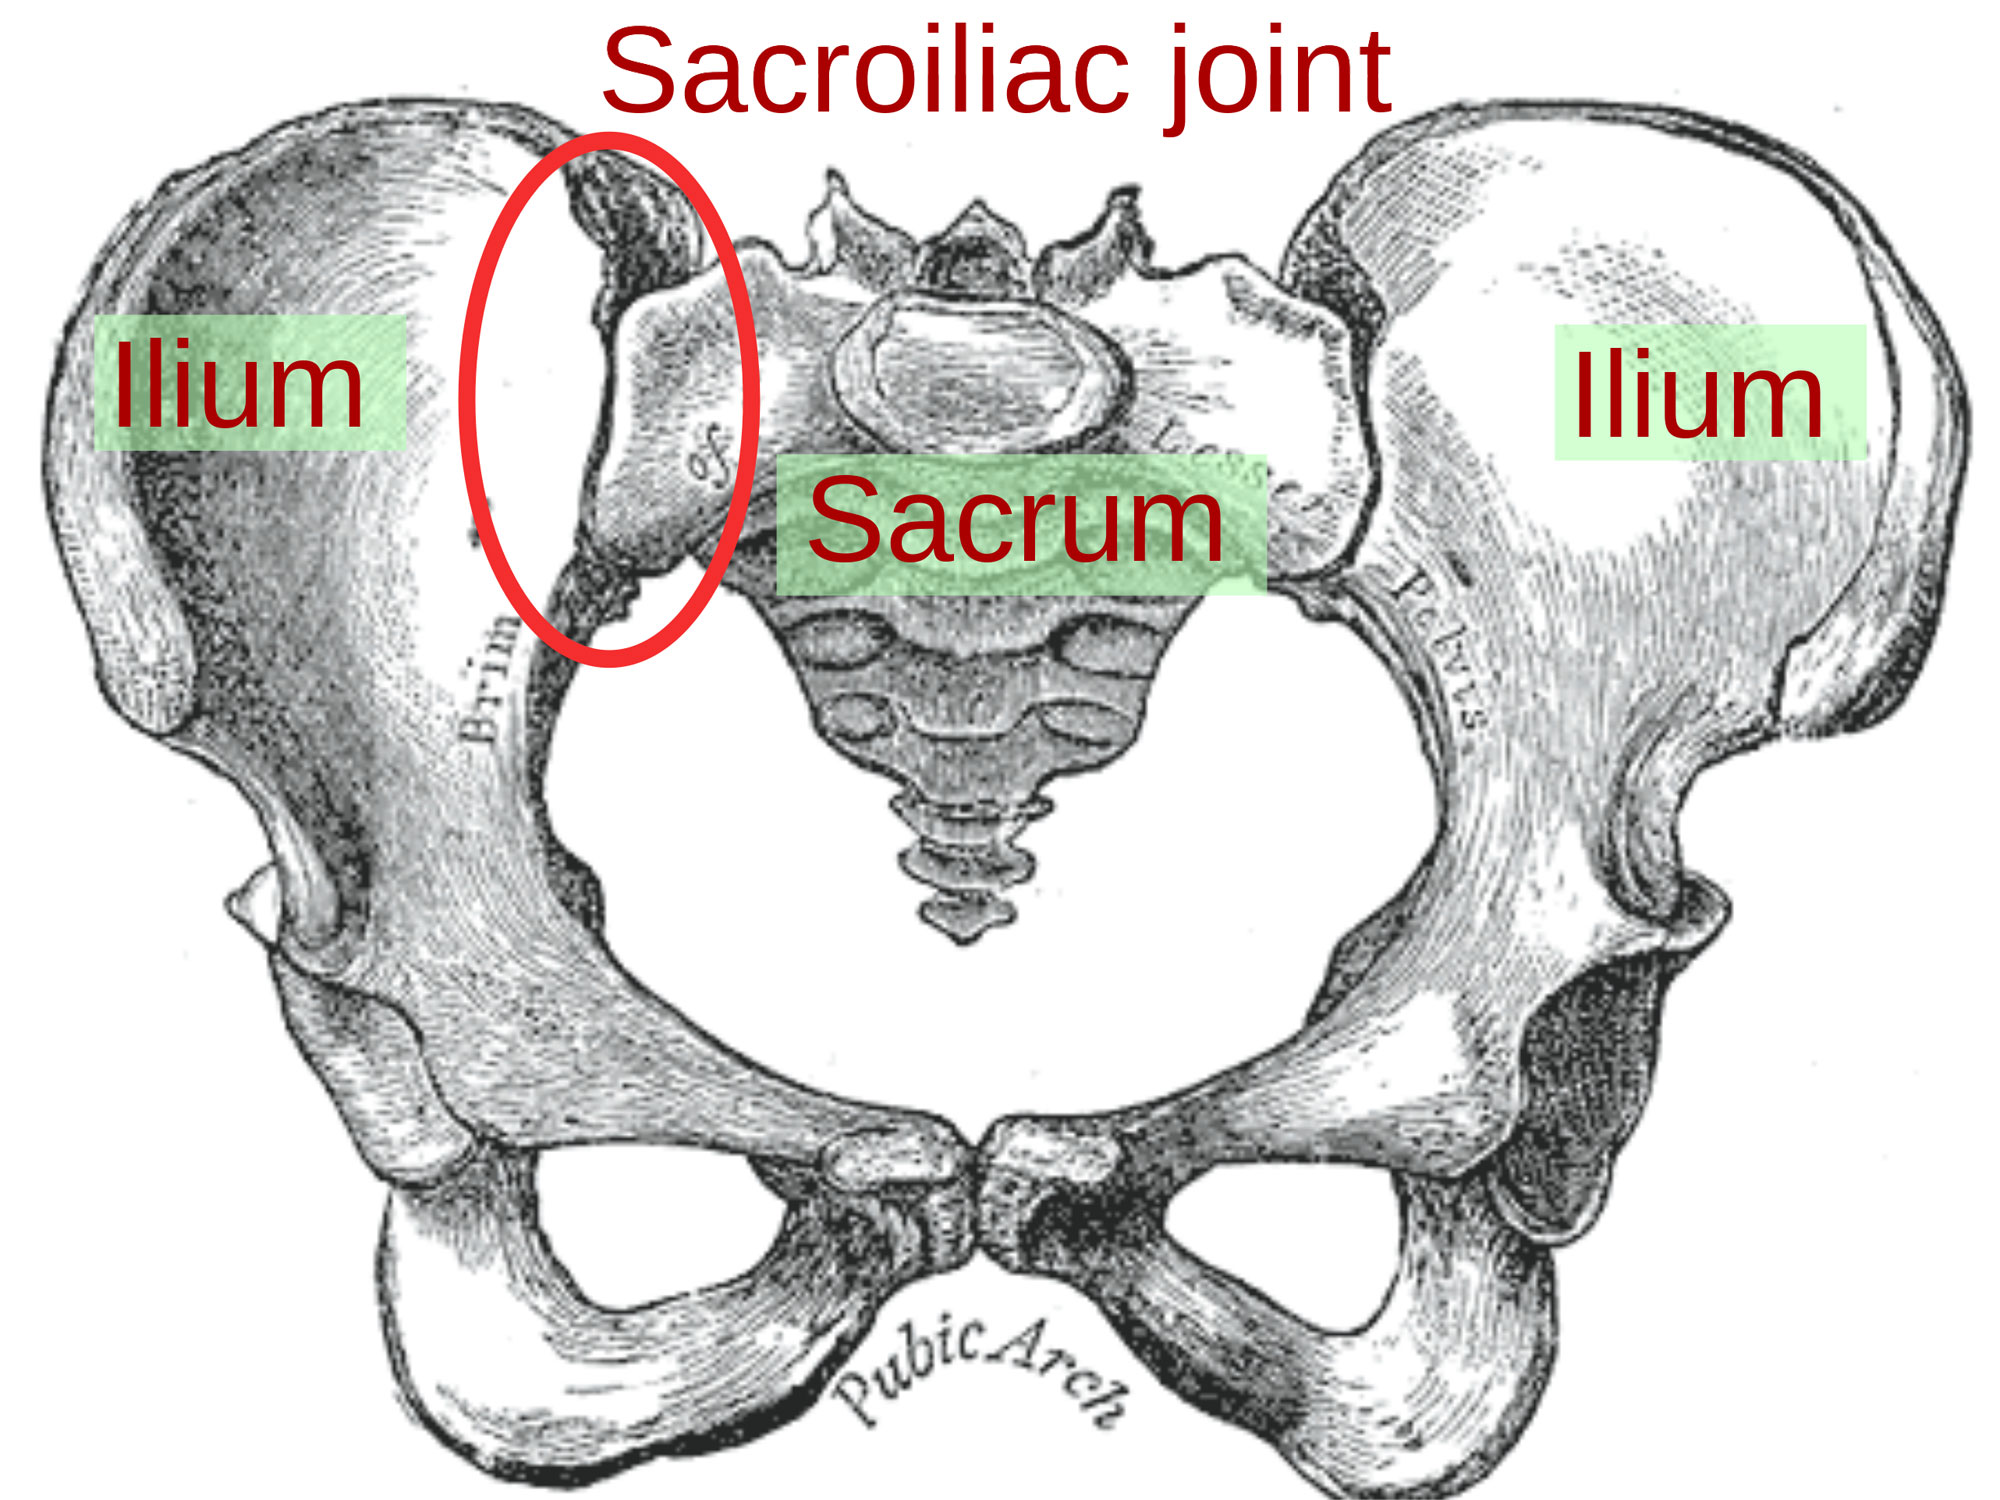
Chiropractic Sacroiliac Joint Adjustment

Way back in December 2021 I injured my back while out running. Unfortunately, I thought it was more general tightness and less injury so I tried to stretch it. That likely led to a longer recovery. In any case, once I worked on getting the inflammation reduced I was able to start with some very light strengthening exercises. The SI joint is a fickle beast. Unlike a sprained ankle, you can’t really “stay off of it” for an extended period of time. Instead, it seems like you have to make the pain as manageable as possible, and then get to work on building strength in the supporting areas. Which I had some early success with. Until I plateaued after roughly three months. I went about two weeks with no noticeable improvement and began to worry that I had reached my “new normal.” As luck would have it, in speaking to someone about back pain they recommended a chiropractor. Honestly, I should have considered that option sooner.

Actually, I did consider it, but in researching the heck out of SI joint pain it seemed about 50/50 whether an adjustment would improve things. For some people it appears to help, for others the improvement is short lived and for still others it actually makes things worse. At the time, I was nervous about that third possibility, but looking back (pun intended!) I probably could have shaved a week off my recovery, maybe more, if I had gone to a chiropractor experienced in treating SI joint pain. After my first adjustment, where my SI joint “popped” like it never had before, I felt like I would be moving onto my next phase of recovery. And I did. So, if you have SI joint pain, I would ask around for chiropractor recommendations, and then check on their experience with this type of injury.
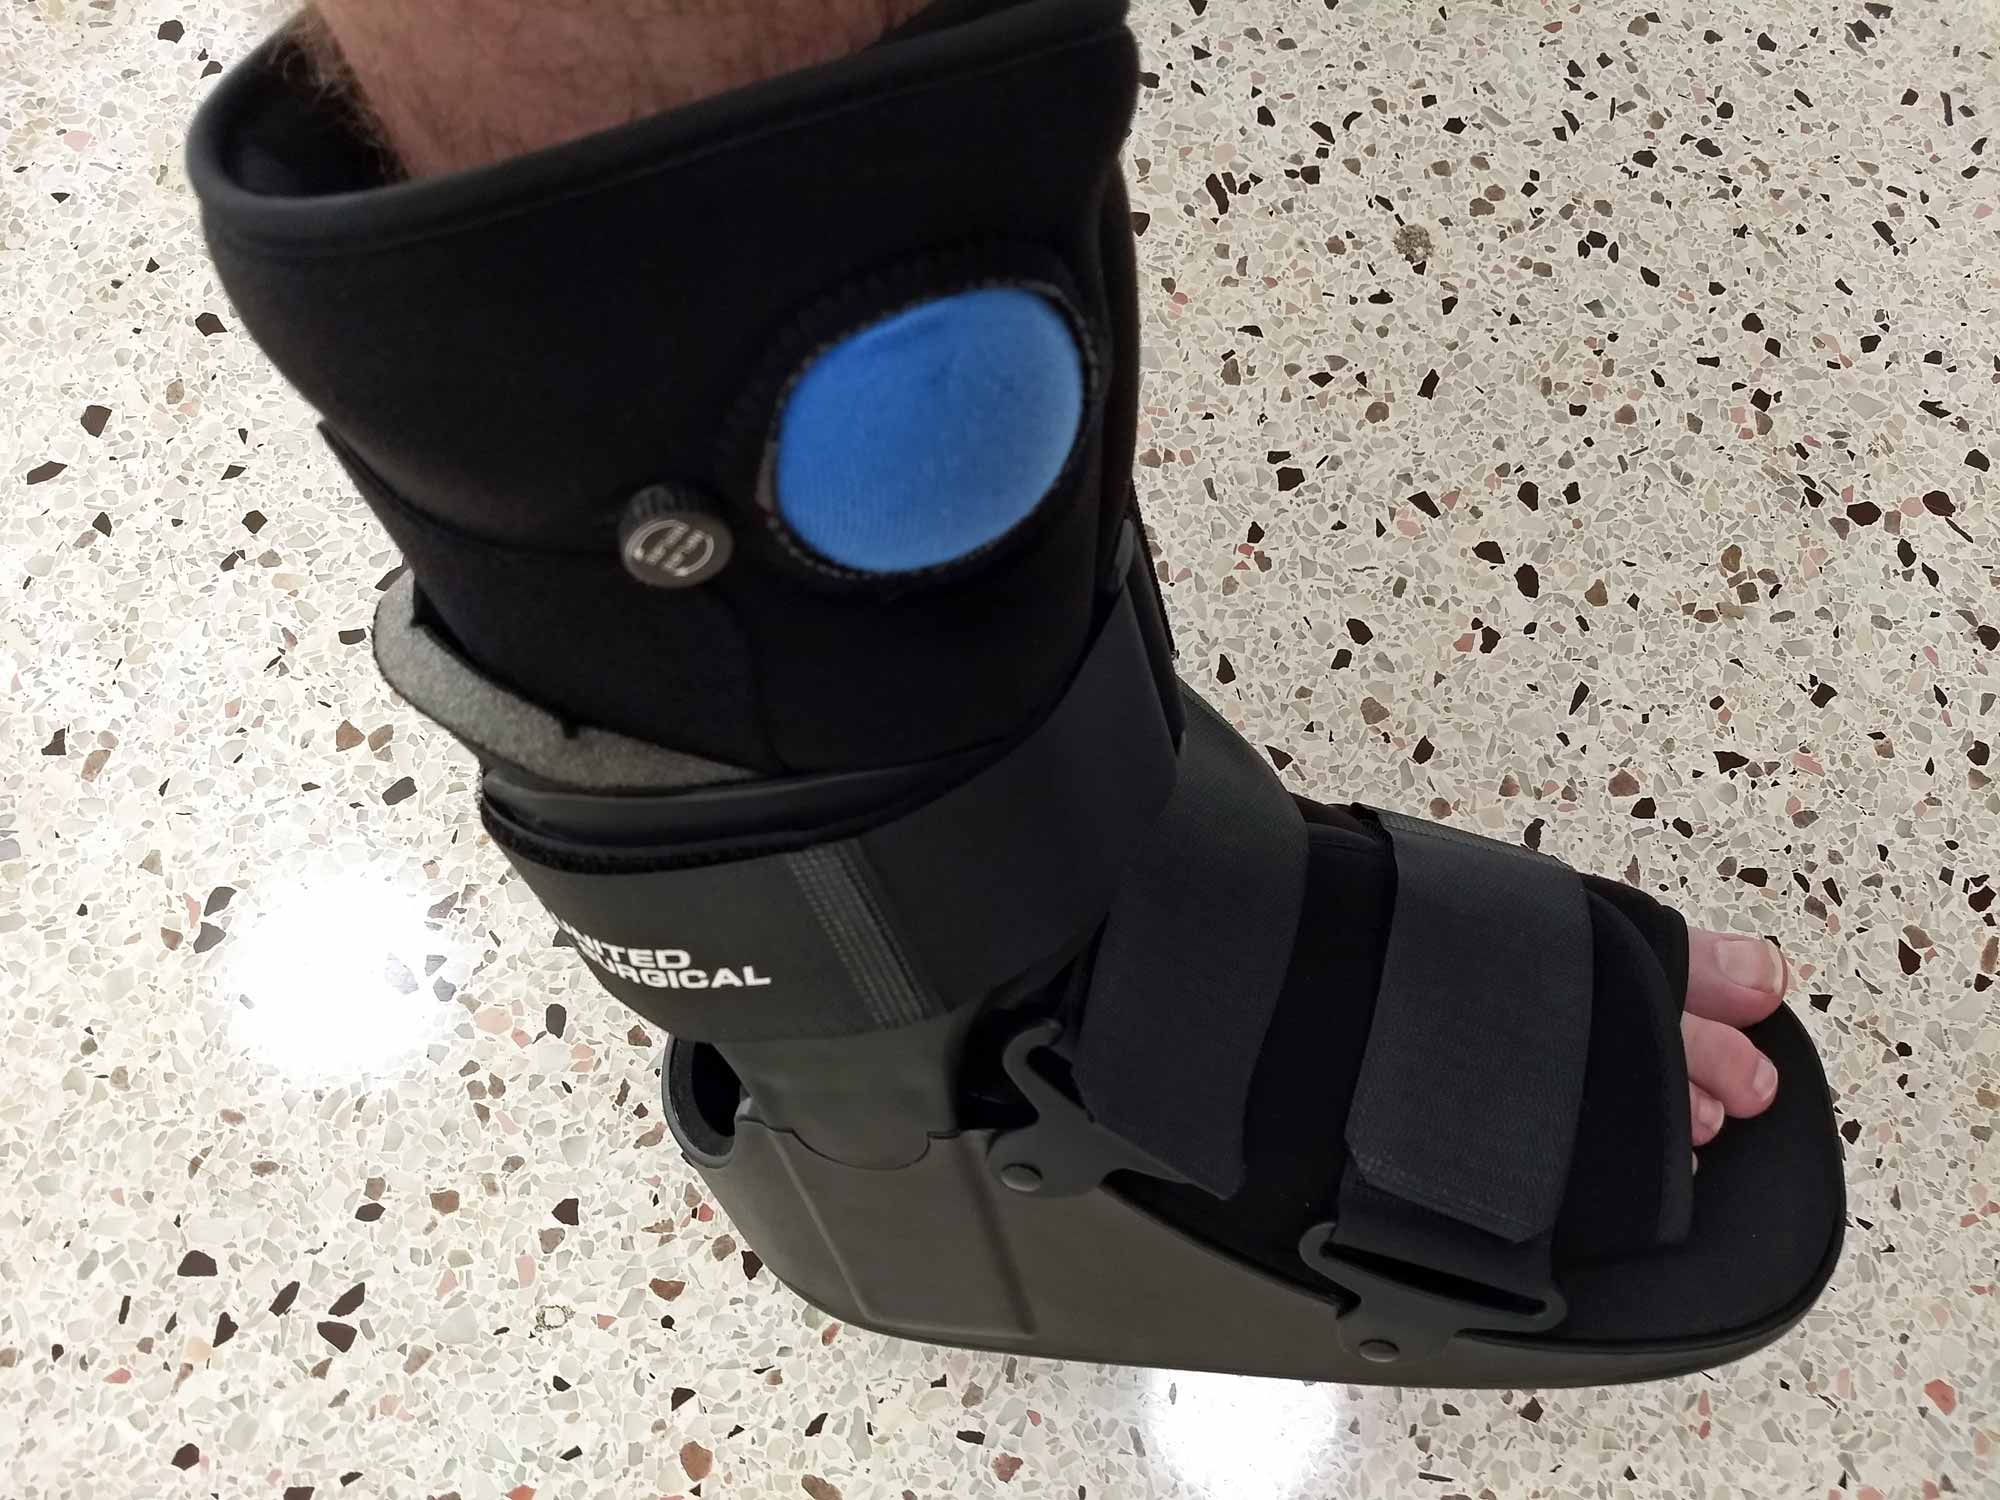
SI Joint Belt

Like I said, the SI joint is a fickle beast. There isn’t a great way to stabilize it when you’re being active. I looked at sacroiliac joint belts, but felt like I could get by with some self-adjustments and then light strengthening exercises. However, I did end up buying an SI-joint-belt-like compression wrap that was recommended on a website by someone documenting their journey through SI joint pain treatment (I’ll try to find and link it). I didn’t start wearing it until after my two chiropractic adjustments so I’m not sure how much it would have helped on its own. I will say that it did give me the confidence to push a little harder with some of my strengthening exercises and just daily movement. I wore it intermittently for about 10 days, and I probably should have started sooner. There really isn’t any downside to wearing one.

What I Started and Continue to Do

Before I added in any weight to my exercises I knew I had to strengthen my core and work on hip mobility. I also have made it a point to improve my posture. No more tucking one leg under the other while sitting (well, almost no more). For my core, I started with easy things like bridges and bicycle crunches. Then, I stumbled across this ab workout on Runner’s World which I now do as my pre-run warm up.

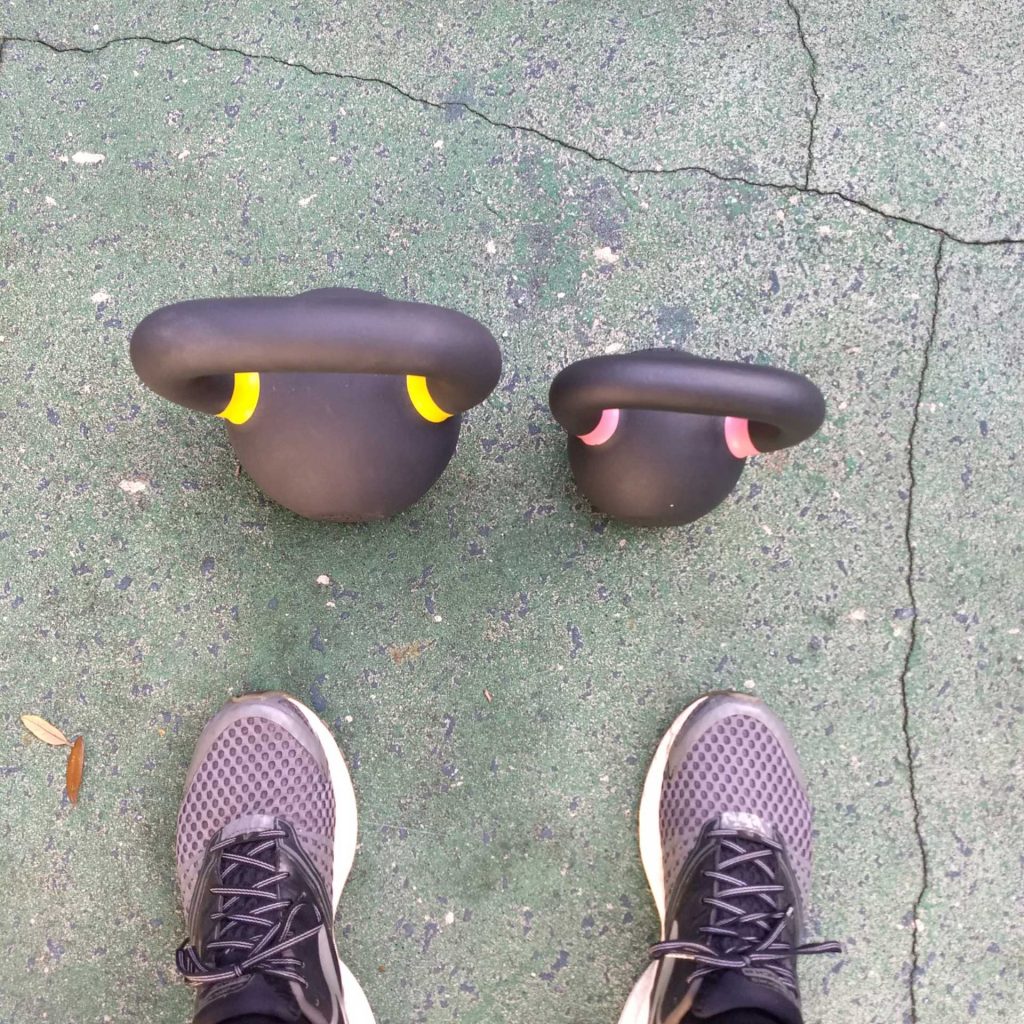
After the chiro adjustments and some core strengthening I felt confident enough to work kettlebells back in. For now, I’m just doing swings using light weight, 18 lbs, and working on building reps. With the lighter weight I feel like I have good control and can really groove the movement.

I’ve also incorporated some “flossing” stretches like a kneeling hip flexor stretch where you lean forward and back in a continuous motion for 10 reps each side.

Back to Running

Thankfully, I was able to get back running about a month ago, and so far everything is going well. It’s still short distances at an easy pace, but I’ll take what I can get. My plan is to gradually increase the distance while keeping the pace relatively slow for at least a month or two. From what I’ve read, the SI joint can be prone to re-injury, and I want to avoid that the best I can.

It’s been an insightful and, at times, frustrating journey. I’ve had a few flareups along the way when I pushed just a little too hard, but those resulted in general soreness that was gone by the next day. From where I am now, I can see that my body was giving me signs about some of my weak points. I should have worked on posture, hip mobility and my core long before my SI joint got out of whack. I am grateful to have figured out a treatment plan that worked for me. If you’re suffering from sacroiliac joint pain, hopefully you can find something that works for you.

Sacroiliac Joint Pain in Runners

Lower back pain
The sacroiliac joint can cause pain in runners. Courtesy Julien Tromeur/Unsplash

Usual disclaimer: This is not medical advice. I am not a doctor.

Right before the holidays I was out for my daily run when I misjudged a curb and ended up slamming down heel first as I came off of it. I told myself that my back wasn’t going to be happy, but it actually didn’t bother me for the rest of the run or even the day after. Instead, the pain didn’t set in until about three days later.

At the time, I thought it was my sciatica flaring up. Typically, a session on the heating pad clears that up, and I’m all good the next day. Instead, the heat made it worse. Originally, I didn’t think much of the curb incident because several days had passed, but as I looked back and did some research I came upon the sacroiliac joint.

As a runner, I’ve become somewhat familiar with the usual pain points. IT band, piriformis, knees, ankles, etc. I’ve been lucky that my back never really bothered me no matter how much I was running or at what intensity. The more I looked into the SI joint, the more it seemed like that curb jam had thrown things out of whack. I ended up moving the SI joint to the top of the list because I could pinpoint the exact spot of pain, it was one-sided and seemed to involve the hip and groin as well. I also read about marathoner Sara Hall suffering from SI joint pain.

Here’s the part where I preach the lesson of rest. Instead of taking a few days off and icing the SI joint, I stupidly did yard work and moved some appliances around. At that point it really didn’t hurt all that much, but I definitely made it worse. What had been a slight dull ache transitioned into constant lower back pain along with hip and groin instability.

So, how did I get myself on the road to recovery? First, I iced the SI joint…a lot. Multiple times a day. I also applied topicals like BioFreeze and T-Relief. I worked on my posture and started standing more while working. My first order of business was to get everything settled down. I wanted a nice baseline to build back from.

That first part took probably four weeks. No running. Light walking. No stretching (I’ll get to that in a minute). Doing whatever I could to keep the inflammation down. Once my back felt the same for a few days in a row I moved into the second phase.

I mentioned stretching, and what I discovered is that my “incident” likely created a hypermobile sacroiliac joint. Now, I’m very familiar with ankle sprains so I understand the general concept of a hypermobile joint and how the treatment differs versus a hypomobile joint. Early on, I thought my back was “stiff” so I was stretching it and my hip flexors every day. Not good. Probably another reason this has been prolonged. Instead, I needed to treat this like a sprain. Let the joint heal and then strengthen it.

The issue with the SI joint is that you use it a lot. If you sprain an ankle, you can fairly easily immobilize it for extended periods of time. Not so with the SI joint. They do make belts to help stabilize the joint, but I haven’t tried that yet. What worked for me (again, not medical advice) was to be mindful of what motions tweaked the joint. Getting up from a seated position definitely caused a jolt if I turned a certain way. I worked on not doing that. I made sure not to step off curbs when walking, instead looking for a break with an easy decline. I think these little things add up, and if you don’t have a serious injury, your body can begin to heal itself.

For strengthening, I found a few things to get me started. The first was this video where a chiropractor goes over some techniques for self-adjustment if you feel like one leg is slightly shorter than the other. He has SI-joint-specific videos, too, but some of the techniques in this one brought me instant relief. Especially the one where the uses a broomstick to help with adjustment. The first time I did that my back pain went from a seven to a two. I couldn’t believe how much better I felt. I’ve done it every day for about a week now, and it’s definitely helped me.

The second was this study regarding strengthening the gluteus maximus and reducing sacroiliac joint pain. It’s a very small sample size, just eight participants, but the exercises they used are included, and I’ve incorporated three of them into my routine (bilateral bridge, unilateral bridge, hip abduction in quadruped). All of these exercises work on strengthening the hip joint which, interestingly enough, my left hip has bothered me for on and off for a number of years. I probably should’ve done something about it a long time ago, but it never got to the point where I had to stop running or working out.

So, where do I go from here? I’m definitely going to continue the self-adjustment techniques and strengthening exercises. I’ll also get back into my kettlebell routine. A stronger core and lower back should help here. Pilates is also worth considering because in my limited experience with it quite a few of these exercises are used. My hope is that, like other joint injuries, time and strengthening will help me avoid future issues.

Nike Pegasus 38: My New Daily Workhorse

I’m looking forward to racking up some miles in the Nike Pegasus 38.

This time last year I was trying to decide whether to replace my Brooks Ghost 11 with the Brooks Ghost 12 or the Nike Air Zoom Pegasus 37. In the end, I didn’t choose either of those, and went with the Asics Novablast instead. I’ve loved running in that shoe, but it’s going to be retired soon and I was back on the hunt for a new daily trainer.

This time around I was considering the Nike Pegasus 38, Saucony Ride 13 and Brooks Glycerin 19. I dropped the Ghost from my choices because I’m trying to keep the drop to 10mm or less. After comparing those three choices I decided to go with the Pegasus 38 for my daily running, and so far I couldn’t be happier. In addition to an upper that feels more plush, here are some of my high points:

  • Bouncy feel that propels up and forward
  • Good lockdown that doesn’t take a lot of fiddling with the laces
  • Average stack height that makes for a stable ride underfoot

And my lone low point so far?

  • It is a bit heavier than other choices

Holding the Pegasus 38 up against my other daily trainers, the Novablast and the Reebok Floatride Forever Energy 2.0, I’m very pleased with how it’s performed so far. Honestly, I had hoped that the Novablast 2 would have a redesigned upper more like the Pegasus 38’s, but it looks like that might not be the case. I am a bit surprised that my Reebok FFE 2 has a higher stack height because it actually feels slightly lower to the ground. I can also push the pace in that shoe a little more than I’ve been able to in the Pegasus thus far.

Yet, if you’re looking for a running shoe that’s a reliable daily trainer to pile up miles in, I don’t think you can go wrong with the Pegasus 38. Its feel underfoot and good lockdown out of the box outweigh any minor concerns I had about its weight versus the other options I was considering. If you’re in the market for a new workhorse, I would certainly take a look at the Nike Air Zoom Pegasus 38.

Too Much Gas in the Tank

I didn’t bonk! I didn’t hit my target time either, though. I would consider my recent 5K race mostly a success because it was a chance to gain more running experience while measuring myself against what I did back in September.

So, what was my target time? It was 19:59. What did I finish the 5K in? I finished in 21:21. Quite a bit better than the 21:59 a few months ago, but still a ways off from going sub-20:00. I do think that being a halfway decent runner at one point in my life has doomed me to having somewhat unrealistic expectations, but I will climb this mountain again. Even if it takes longer than I expected. The journey is part of the fun, after all!

Takeaways

  • Old-school tech is not great when it comes to running shoes.
  • There’s a lot of “feel” to pacing that only comes with repetition.
  • Running in-person races is better than virtual ones (this one was done as safely as possible).
  • It’s a fine line between leaving it all on the course successfully and finishing with too much left in the tank.

Next Training Block Begins

After my calves recover a bit I’ll begin my next training block. Seriously, those Lunaracers, while they felt fine during the 5K, destroyed my calves. I’ve been stretching, massaging, applying various creams, etc., and they’re just now unwinding. Definitely have to pick up something newer than circa 2010. Currently, I have a 5K race on August 14 penciled in. That would be a 15-week training block, which is quite long, but I need the extra time to dial in pacing and (intelligently) build up my mileage. In any case, I’ll still be aiming for that 19:59 until I hit it and move onto the next ambitious goal.

Running Intervals, Trying Not to Bonk

Nike Lunaracer 1 shoes used for running races and track workouts
Nike’s Lunaracer 1 tips the scales at 6.6 oz and features a seven millimeter drop.

You may remember this post from a few months ago where I briefly went through my “bonking” during a 5K time trial. Well, it’s been quite a bit longer than eight weeks (thanks holidays!), but I’m scheduled to run another 5K race this coming Saturday. I will certainly be drawing on that experience from September in order to run a smarter race. Thankfully, I’ve also built a better base of mileage, and I’ve put in some speed work. Which is why you see those old school Lunaracer 1s at the top of this post.

I broke those out last week because I’m planning to race in them and wanted to make sure they were ready for it. Despite their age (I’ve probably put less than 15 miles on them), they seem ready for the challenge. I don’t remember exactly when I purchased them, but it’s probably been at least 10 years ago and 99% of that time they’ve been in a box. To be sure, they are old school. No carbon plate, an upper that’s a bit rough around the edges and Lunarlon in the midsole. However, they’ll get the job done on Saturday. After that, I’ll determine whether I want to upgrade the footwear I’m using for speedier intervals as well as 5K and 10K races.

Work that Speed

Speaking of intervals, the most recent workout I ran was 6x600m with 200m active recovery between each rep (with a mile warmup and a mile cool down). I have to say, I felt great afterwards. Definitely worn out, but not overly so. In fact, I was running it at what I thought my 5K pace for Saturday should be, but probably could have dropped it down a few seconds. Certainly a good problem to have. I am looking forward to adding in more interval training after this race. I started out with mostly 8x400m (might be a bit too “track-focused” for big 5K improvements but I like them anyway), but threw in some ladders here and there. Running that 800-1000-1200-1000-800 with two minutes of active recovery between each rep definitely had me fondly remembering the 400m intervals I had been running. In just a few days I’ll see what all of this work has accomplished. My hope is that I’ll be able to run both smarter and harder.

5K Time Trial Rookie Mistake + Running Shoe Update

Asics Novablast as a daily trainer running shoe
The Asics Novablast has been a welcome surprise. Courtesy Asics

You may remember my post from back in May where I was on the hunt for my next pair of running shoes. At that point, I thought I was going to be choosing between the Nike Pegasus 37 and the Brooks Ghost 12. Then, I started digging deeper into the daily trainer category and came across the Reebok Floatride Forever Energy 2.0 at a nice price. I have to say, I’ve been very surprised by its performance.

The first thing I noticed is its bounciness. It was my first experience with the Floatride Energy Foam, and the “pop” caught me offguard, in a good way. The upper isn’t super plush, but the ride is really good. One thing to consider with this shoe is that it runs a little long for some people. I typically wear a size 9.5, and I ordered both a 9 and a 9.5 to try. The 9 was pretty tight on my left foot, but felt fine on my right. The 9.5 felt good on my left, but just slightly large on my right. Ultimately, I went with the 9.5, and I just have to be sure to tighten the right shoe enough before heading out. A size 9.25 would have been perfect.

Another Option Emerges

Just when I thought I had my daily trainer situation squared away I came across another good deal. This time it was on the Asics Novablast. The tall stack height, 37mm in the heel and 27mm in forefoot, appealed to me for use on longer runs, and so far it’s seemed to keep me from feeling too beat up as I increase my base mileage. I will say, that stack height can feel ever so slightly unstable at first. After I put about 30 miles on the shoes it felt like they compressed just slightly and that my foot was sitting more “in” the insole rather than “on top” of it. If that makes any sense. The Novablast also has a nice “pop” or “push” that makes running in them quite fun. It’s a different shoe, but in a good way.

Rookie Running Mistake

With the running shoe updates out of the way, it’s time to talk about my Trials of Miles 5K time trial mistake. First off, huge thanks to that entire team for putting on such a cool event. I had a blast putting up a time even though I was nowhere near race shape, and it’s motivated me to put together a serious training plan. Now, about that rookie mistake. I went out way too fast. I figured that to advance in the Masters bracket I would have to run sub-20:00, and I was right. My first mile should’ve been around 6:25-6:30 pace. Instead, I was closer to 6:15 and the wheels ended up coming off. What can I say, the adrenaline got the best of me. That combined with no interval or tempo training to get used to “feeling” what that pace felt like doomed me. No worries though, I’m looking forward to building out my base, throwing in some speedwork and seeing how much I improve in the next eight weeks.

Why I Might Choose the Nike Pegasus 37 Over the Brooks Ghost 12

Brooks Ghost 12 (top), Nike Pegasus 37 (bottom) Courtesy Brooks and Nike

I’m quickly approaching the point where I need to replace my current (main) pair of running shoes with something new. The Brooks Ghost 11 I currently run in has proven to be a more than capable workhorse, but the new Nike Pegasus 37 has definitely piqued my interest. Why would I possibly select that over moving into the Ghost 12? Let’s find out!

First off, I used to be a Pegasus fanboy. It was the first pair of serious running shoes that I owned. I think it was the Pegasus 10. Those were amazing shoes, and I put many miles on them from tracks to trails. I continued to buy the newest iteration whenever I was in the market for running shoes, but that ceased after owning the Pegasus 30.

To me, the 30 felt clunky and awkward. I felt like it wasn’t terribly smooth, and I didn’t really enjoy running in it. I searched for something else in the Nike lineup, and settled on the Flyknit Lunar 2. Which was great for shorter runs or speed work, but it just didn’t have quite the cushioning I needed for longer runs. The search was on again. This time I looked outside the Nike sphere.

Brooks Helps Me “Run Happy”

That’s how I found Brooks. I had always been aware of the brand, but didn’t really know anyone, at the time, who ran in them. My first foray into “Running Happy” was with their Launch line. It’s a no-frills neutral trainer, and I mean that in the nicest way possible. Enough cushioning to get you through runs and workouts without feeling too beat up the next day. I’m still using a pair of Launch 3 shoes (I stockpiled a few from a sale) for tempo runs and mild speed work. The only problem was I got into playing more basketball and devoted less time to longer runs. Then, when I decided to ramp up my running I found that I needed some extra cushioning. That’s where the Ghost 11 comes in.

I discovered a friend was running in the Ghost 10 and loved them. The Ghost 11 had recently come out so I decided to give them a shot. Within a few runs I knew I was going to love the shoe. It’s got just the right amount of cushioning, but without translating that into feeling heavy or awkward. I can rack up mile after mile without worrying too much about dead legs. It also has great impact protection in the heel which I needed early on because I found that I would start to heel strike as my legs got tired. All in all, it’s been a wonderful and reliable daily running shoe. So why the Pegasus 37?

Pegasus 37 On the Short List

Well, as I’ve increased my mileage and rounded back into running form I’ve been looking for something a little more svelte. Like I said, the Ghost 11 doesn’t feel bulky, and it isn’t all that heavy, probably just under 11 oz. for my size. However, the new Pegasus 37 is closer to 10 oz. and appears to be more streamlined. Though, I will say I heard some complaints of a narrow toe box in the 36 so I’m curious to find out if that carried over to the 37.

I would also like to try getting back into shoes with a lower drop. The Ghost series is typically around 12mm whereas the Pegasus 37 is 10mm. Not a huge difference, but it’s been my experience that those lower drop shoes just “feel” faster. I did enjoy having that higher drop in the Ghost 11 as I battled some Achilles issues. However, I feel like I’ve worked those out, and am ready for something a little lower.

There are two reasons I might stick with Brooks, though. The first is that the Pegasus 37 looks like a really low cut. I know photos can be deceiving, but the space between the top of the midsole and the bottom of the ankle cutout looks quite a bit narrower on the Peg versus the Ghost. It might not be a huge deal if the shoe really locks your foot in.

The second reason would be heel cushioning. I know this sort of runs counter to my desire to move into a shoe with a lower drop, but it seems like the Pegasus 37 has focused more on forefoot cushioning with the new airbag than heel cushioning. I’ve never (knock on wood) had much issue with forefoot pain, but I have had heel pain that radiated up into my knees and back. It wasn’t fun, and while I’m certainly a stronger runner now than when that happened, I would like to take precautions to prevent it from happening again.

Ghost 12 or Pegasus 37?

So where does that leave me? Honestly, I’m going to try both of them. I’m fairly confident the Ghost 12 will fit like my Ghost 11. It could easily become my next 400+ mile workhorse of a running shoe. Yet, there’s just something about the Pegasus 37 that speaks to me. At least as much as it can through a computer screen. I almost picked up the Pegasus 36 at various times when it went on sale, but never did. It looked nice. The reviews were mostly favorable. However, it just didn’t capture my attention the way the 37 has. I didn’t look at it and think about how fun it might be to run in.

Ultimately, that’s the main of the goal of a good running shoe, right? Sure, you want impact protection, a solid fit and durability. Hopefully, all of those combine just right to give you a shoe that you look forward to putting on when you’re heading out the door, and you don’t think twice about as the miles pile up.

Kettlebell Swings and Running

Kettlebell Swings Before Running
Kettlebell exercises can help improve your running performance.

I had been thinking of writing a piece about kettlebell exercises and running for a few weeks. Seeing this Runner’s World article today finally got me to do it.

I’ve never been much of a gym rat. Spending a lot of time moving from machine to machine, or lifting various free weights just has never been my thing. Honestly, I don’t even like running on a treadmill. However, when a buddy suggested I give kettlebells a try and sent me a link to the book “Simple and Sinister,” I became intrigued.

I liked that I could knock out a circuit of kettlebell exercises before heading off for a run, and it seemed to be a pretty good warm up. However, I have discovered something that’s caused me to change up my routine a bit.

At some point, I noticed that my breathing pattern while running had changed. I initially chalked it up to pushing the pace too hard or the weather (hot, humid, lots of pollen, etc.). Then, after taking time off from my kettlebell exercise routine, I noticed my breathing was back to normal. Instead of having the occasional shallow breath followed by a deep gulp of air, everything was smooth again.

My first thought was that the time off from running and kettlebell swings had allowed me to recuperate a bit. That in turn had helped me with my form and breathing pattern. Then, I read a different Runner’s World article about doing strength training before cardio workouts and vice versa. That got me thinking about my kettlebell warm-up routine.

After reading that, I think maybe the kettlebell exercises, specifically swings, could have been tightening my core to the point that it was screwing up my breathing pattern. Obviously I haven’t tested this, but it really felt like my diaphragm was constricted at times and I couldn’t breathe from my belly at all. I ended up taking shallow chest breaths, and then gulping for air.

Now, I’ve switched to using the kettlebell exercises as a way to cool down (which I used to neglect), and for staying loose and building strength on “rest” days. It’s nice because I can easily adjust my intensity by exercise and /or weight.

I definitely think most runners would benefit from trying out a few kettlebell exercises, but any that do should be mindful of how they may be affecting their running performance and adjust accordingly.

Enko Running Shoes With Springs

Enko Spring Running Shoes

These running shoes from Enko claim to reduce joint stress.

I’ve seen some interesting running shoes over the years. Nike’s Zoom Fly Vaporfly 4% with its carbon fiber plate is one of the more recent ones promising performance gains. Yet, that shoe seems rather pedestrian when you check out this offering from Enko. Here’s how the company’s press release describes it:

True innovations are scarce. Even though running is a highly traumatic sport for joints, innovation in design has been limited for a long time. No steps forward to improve stride shock absorption and preserve runner’s health have been taken. No breakthroughs until ENKO arrived on the market.

I don’t know that no advancements have been made regarding cushioning in running shoes. You can easily find ones with varying levels of cushioning to suit whatever gait and mileage requirements you may have. Though, there are very few (none?) companies using materials other than foam or air bladders.

Exactly who is this for?

I haven’t been able to track down the weight which I imagine might be somewhat hefty. I also wonder how much it will affect stride length, leg turnover, etc. because right out of the gate they’ll probably be a little awkward to run in. However, when I showed my wife, who’s been involved in two car accidents (neither being her fault) and has the back and knee pain that comes with that, she was intrigued. She used to be a casual runner, but her knee joints just can’t do it any longer. I do wonder if something like this would help her be able to put down even a mile or two.

At $372 it’s a somewhat expensive experiment. Though, the company does say you have 30 days to try them, and if you’re not satisfied, you can return them for a 100% refund. I’m thinking about taking a closer look at them, and will report my findings if I do.

How to Treat a Sprained Ankle

Tips to Heal a Sprained Ankle

As soon as it happened I knew I was in trouble.

I’ve sprained my ankles many times to varying degrees and had countless close calls. I had been lucky for a long time, but that afternoon my luck finally ran out.

For about two years, I had been playing pickup basketball games with co-workers. After playing a lot of basketball in my younger days I took a few years off in favor of running and surfing. However, after my first game back I was hooked.

The competition. Working to re-sharpen skills I once had. Team camaraderie. All of it outweighed the potential for injury even as other guys went down with torn ACLs, bruised ribs and, yes, sprained ankles. Eventually, the injury bug came to take a bite out of me as well.

By this time, I was confident enough in my skills to drive to the basket instead of settling for a jump-shot. On this play I drove to the basket and was met under the hoop by the center on the other team. He outweighs me by probably 70 pounds, and when he stepped on my foot my ankle never stood a chance.

Instead of elevating to the hoop, my foot was pinned to the court and my momentum carried me forward and to the right. My right ankle performed the classic inversion, and I heard the Velcro of my ankle brace stretch. That brace had saved me numerous times before, and I wouldn’t hesitate to recommend it to anyone, but that day it was just slightly overmatched.

I went to the ground, took a few moments to focus my breathing and then got back on my feet to assess the damage. I knew for sure it was a solid grade 2 sprained ankle, and probably more like a 2.5. I stayed on the court to close out the game, thankfully a win. Then I went to the bleachers and iced it before heading out to apply more and more ice and elevate it. I also crafted my recovery plan. One of the benefits of enduring multiple sprained ankles is that you gain knowledge with each instance.

What was my plan for healing a sprained ankle?

My first order of business was to ice the heck out of it. You’ll find all sorts of conflicting information regarding ice versus heat, how long to ice, etc. Personally, I’ve found that my body responds very favorably to icing. Plus, I knew that getting the swelling down would make it easier to walk on. I started with basic ice packs, and then, once the swelling subsided a bit, incorporated an ice pack for knee pain because it encircled the outside of my ankle perfectly.

With the swelling under control, I moved onto stability and pain relief. Due to how “loose” my sprained ankle felt I knew my regular brace wouldn’t cut it for traversing parking lots and stepping off curbs. I ended up going with one that had air bladders where I could control the pressure and a hard exterior. It worked well, though, I might recommend buying one of those shoe risers for the opposite foot because the height difference wasn’t kind to my lower back or hips. For pain relief, which was only needed after a full day of walking, I alternated between Zim’s Max Freeze and Biofreeze. I felt like the Zim’s gave better initial relief, but Biofreeze lasted longer. I never needed to take any sort of pain medication.

Next, I decided to expedite the healing process as much as I could. This came in the form of topicals, supplements, diet additives and rehab exercises. For topicals, I went with The Fay Farm Healing Hemp Salve. I feel like both their regular version and the hemp oil extract product helped reduce inflammation and improve healing. On the supplement side, I initially tried to up my collagen intake with Bulletproof collagen bars. The fudge brownie I tried wasn’t terrible, but it wasn’t great. In the end, I upped my vitamin C and alpha lipoic acid doses. I also tried to increase my servings of blueberries for their anti-inflammation properties. To round out my recovery I started resistance training about four weeks after spraining my ankle. Resistance bands let me dial in the pressure applied to the ligaments and joints, so I didn’t push it too far. Once you’ve suffered a few sprained ankles, re-injury is a common occurrence.

By now, you’re probably wondering how my sprained ankle is doing.

I’m seven weeks in, and can walk briskly, get up and down stairs and flex my ankle a little bit more each day. I might be able to lightly jog on it, but don’t feel comfortable trying just yet. Based on what I’ve read and past experience, my timeline for jogging was originally eight to 10 weeks. I feel like my treatment plan has probably shaved a week, maybe more, off that original estimate.

Remember, what works for me may or may not work for you. If you’re looking at sitting out multiple weeks of athletic competition, use that time to experiment a little bit. Find what your body responds to in terms of reducing inflammation and increasing healing. A simple vitamin increase might supercharge your body’s natural healing response.

Your ankle is already sprained so you might as well focus on finding the keys to unlock your body’s healing potential.